I'm knitting up a bunch of eggs for play food for the kids for Christmas and here's the pattern I came up with. I wanted a knit version of the cute Egg Babies (crochet). It's roughly based on the Curly Purly Egg pattern, but I found that that pattern knitted with worsted weight yarn on size 7s or 8s was giving me a goose egg size rather than chicken so I adjusted it slightly.
Cast on 9 stitches over 3 double pointed needles (3 st per needle), use a 4th needle to knit in the round.
Row 1: K
Row 2: K1, M1 (lifted bar increase), K2 (repeat for remaining 2 needles)
Row 3: K
Row 4: K1, M1, K1, M1 (around, will have 6 st per needle)
K in stocking stitch for 9 rows, begin decreases
Decrease Row 1: K1, K2tog*, K1, K2tog* (around)
Row 2-3: K
Row 4: K2tog* (around)
Cut yarn leaving a long tail, thread it onto a large yarn needle, weave through loops on needles, remove needles, stuff egg, pull thread snug and sew up tightly. Hide ends. Shape egg with needle.
* I think I might have invented an "invisible" decrease, or at least slightly less obvious decrease. Slip 1 knitwise, move that stitch back to the left needle (purlwise), knit 2 together thru back loops.
Tuesday, November 06, 2007


Wednesday, October 31, 2007
My journey into Ubuntu
My dad turned me on to Ubuntu (operating system) the other day, was raving about how cool it was, so easy to install. Mom had been having problems with Windows on her computer so he decided that they didn't have anything to loose in trying it and installed it on her computer.
The more he talked about it, the more I was dying to try it too. I've always been smitten by the idea of trying an alternate OS, but was always way too scared, felt totally out of my element so never did anything about it. But this time (since I knew he was there to help hold my hands), I got brave and decided to give it a try. I installed version 7.10 - Gutsy Gibbon (I think they might have released an "H" version in the last little bit, not sure).
I had to burn the .iso file to a disk, then boot to the disk to get it to start up. Ubuntu lets you test drive the OS (without making any changes to your hard drive) to see if you like it or not. I was mightily impressed with what I saw so after a little hesitation, I started the install. I got a little nervous when I got to the hard drive partitioning part, probably should have done a little more research because I did something wrong (I think I was supposed to do the Manual partitioning, but I didn't chose that) and now Windows doesn't recognize my hard drive (a 2nd drive, not with Windows installed on it, just a data disk). Windows thinks I need to format the drive. But Linux sees it just fine. Strange. I tried to format the drive twice in Windows but it said it couldn't both times. Luckily I had backed everything on that drive up the night before so it wasn't the end of the world.
Linux is a whole 'nother animal from Windows so I had to do a fair bit of asking Papa for help and searching around the net for directions on how to install programs (one of the major differences between Windows and Ubuntu) and other various commands I had to do from terminal (kind of like DOS prompt).
Ubuntu is awesome in that it detects almost everything that it should. I was immediately on the net, could see all my drives and all the files in them (even on the drive that Windows thinks is toast), my display was lovely...
I now don't remember everything I did, but I started figuring that if this was going to work for me, I'd have to be able to run certain Windows programs in Ubuntu (or therabouts). Dad told me about a commercial virtual machine program out there that would allow you to use Windows software (actually run a virtual Windows session while in Ubuntu), so I looked into it, installed the trial, wasn't too impressed.
I searched a little more and found a free gem of a VM program called VirtualBox. While it's not perfect and it does have it's little things here and there, it's so far working GREAT! I created a VM, installed Windows 2000 onto it (at first I was worried that when it said it had to format C: that it was actually going to wipe out my C drive, but not to worry, it just thinks the .iso image file "partitioned" for it is C drive, what it doesn't know won't hurt me), got it on the net (with a lot of help from DH), and I'm now in the process of Windows Update, then on to installing all the drivers I still might need, and then some of my most needed Windows software (Paint Shop Pro, Microsoft Word, Excel & Publisher, (sorry OpenOffice and Gimp, you just didn't do it for me)). Then I will be in hog heaven with access to Windows and Linux software and a super little OS to run the Linux stuff on...
...my kids' computer is next, bwahahaha!
Pros:
Cons:
Favorite Linux programs so far:
Gparted - graphical partition editor, again you burn the .iso to a disk, then boot to the disk to edit the partitions. I think I should have done this even before installing Ubuntu, maybe my drive wouldn't have confused poor Windows so badly.
VirtualBox - Run Windows from Linux, access both without needing to reboot. Another little plus about VBox is that Windows loads so bloomin' fast compared to the old way of actually having to reboot the whole computer. Windows restarts in it's little VM window so I don't have to stop what I'm doing in Ubuntu just to restart Windows. Nice.
The more he talked about it, the more I was dying to try it too. I've always been smitten by the idea of trying an alternate OS, but was always way too scared, felt totally out of my element so never did anything about it. But this time (since I knew he was there to help hold my hands), I got brave and decided to give it a try. I installed version 7.10 - Gutsy Gibbon (I think they might have released an "H" version in the last little bit, not sure).
I had to burn the .iso file to a disk, then boot to the disk to get it to start up. Ubuntu lets you test drive the OS (without making any changes to your hard drive) to see if you like it or not. I was mightily impressed with what I saw so after a little hesitation, I started the install. I got a little nervous when I got to the hard drive partitioning part, probably should have done a little more research because I did something wrong (I think I was supposed to do the Manual partitioning, but I didn't chose that) and now Windows doesn't recognize my hard drive (a 2nd drive, not with Windows installed on it, just a data disk). Windows thinks I need to format the drive. But Linux sees it just fine. Strange. I tried to format the drive twice in Windows but it said it couldn't both times. Luckily I had backed everything on that drive up the night before so it wasn't the end of the world.
Linux is a whole 'nother animal from Windows so I had to do a fair bit of asking Papa for help and searching around the net for directions on how to install programs (one of the major differences between Windows and Ubuntu) and other various commands I had to do from terminal (kind of like DOS prompt).
Ubuntu is awesome in that it detects almost everything that it should. I was immediately on the net, could see all my drives and all the files in them (even on the drive that Windows thinks is toast), my display was lovely...
I now don't remember everything I did, but I started figuring that if this was going to work for me, I'd have to be able to run certain Windows programs in Ubuntu (or therabouts). Dad told me about a commercial virtual machine program out there that would allow you to use Windows software (actually run a virtual Windows session while in Ubuntu), so I looked into it, installed the trial, wasn't too impressed.
I searched a little more and found a free gem of a VM program called VirtualBox. While it's not perfect and it does have it's little things here and there, it's so far working GREAT! I created a VM, installed Windows 2000 onto it (at first I was worried that when it said it had to format C: that it was actually going to wipe out my C drive, but not to worry, it just thinks the .iso image file "partitioned" for it is C drive, what it doesn't know won't hurt me), got it on the net (with a lot of help from DH), and I'm now in the process of Windows Update, then on to installing all the drivers I still might need, and then some of my most needed Windows software (Paint Shop Pro, Microsoft Word, Excel & Publisher, (sorry OpenOffice and Gimp, you just didn't do it for me)). Then I will be in hog heaven with access to Windows and Linux software and a super little OS to run the Linux stuff on...
...my kids' computer is next, bwahahaha!
Pros:
- Ease of install
- Lovely desktop theme right out of the box
- Some neat visual effects (lots actually, wrapped up in a thing called Compiz, and they are SO fun!)
- Price - Free!
- The project is alive, it's constantly being developed, updated, issues addressed
- Lots of free software to chose from
- Not a huge learning curve coming from Windows
Cons:
- Firefox for Ubuntu doesn't have the "copy image" command
- Can't get the Flash Player to work in Opera
- Wish Windows programs would work without any extra stuff needed
- Potentially not as bug-free as non-free OSs
- Back everything up, anything could happen during install
Favorite Linux programs so far:
Gparted - graphical partition editor, again you burn the .iso to a disk, then boot to the disk to edit the partitions. I think I should have done this even before installing Ubuntu, maybe my drive wouldn't have confused poor Windows so badly.
VirtualBox - Run Windows from Linux, access both without needing to reboot. Another little plus about VBox is that Windows loads so bloomin' fast compared to the old way of actually having to reboot the whole computer. Windows restarts in it's little VM window so I don't have to stop what I'm doing in Ubuntu just to restart Windows. Nice.
Wednesday, October 24, 2007
Yarn Harvesting
Yarn harvesting, sweater recycling, whatever you call it, it's great fun (at least for this nerd) and super thrifty. I have a thrift shop near my home that sells sweaters for $0.25 each on Thursdays (1/2 off day) and I can usually get 5 or 6 skeins worth of yarn from one sweater. I never measure the yardage, but you can make a pvc niddyy noddy or rig up any of several other ways to figure the yardage if you want.
The first thing to note is the seaming of the sweater you are looking at. There are two ways that sweaters are seamed, one is the material is knitted on a machine in large sheets, the pieces are cut/serged and serged together (like any other article of commercial made clothing). The other way is the sweater is knit on a machine, but with a precise pattern and one long piece of yarn is used (going back and forth up the sweater) and this long piece can be unraveled and wound into balls.
Here's what a serged seam (not useable for yarn harvesting) looks like:
And here's a chain stitched seam (what you want to look for):


The chain stitch is similar to the type of stitching that is done in the top of dog food bags that allows you (if you can find the tail) to rip the string right off the top of the bag and open it easily.
 Here's a drawing of what to look for when getting ready to separate the pieces of your sweater. Find the side of the chain where the rounded part of the chain is closest to an edge. Slide a seam ripper under one of the chains and cut it (try not to nick the sweater yarn). You may have to loosen one or two more chains before you can start to pull the string from the other side of the seam and rip the whole seam out. Sometimes as your ripping it out, the chain might snag, just give a quick tug to both sides of the sweater and it should break free and you can continue ripping out the seam.
(more to come as I have time)
The first thing to note is the seaming of the sweater you are looking at. There are two ways that sweaters are seamed, one is the material is knitted on a machine in large sheets, the pieces are cut/serged and serged together (like any other article of commercial made clothing). The other way is the sweater is knit on a machine, but with a precise pattern and one long piece of yarn is used (going back and forth up the sweater) and this long piece can be unraveled and wound into balls.
Here's what a serged seam (not useable for yarn harvesting) looks like:

And here's a chain stitched seam (what you want to look for):


The chain stitch is similar to the type of stitching that is done in the top of dog food bags that allows you (if you can find the tail) to rip the string right off the top of the bag and open it easily.
 Here's a drawing of what to look for when getting ready to separate the pieces of your sweater. Find the side of the chain where the rounded part of the chain is closest to an edge. Slide a seam ripper under one of the chains and cut it (try not to nick the sweater yarn). You may have to loosen one or two more chains before you can start to pull the string from the other side of the seam and rip the whole seam out. Sometimes as your ripping it out, the chain might snag, just give a quick tug to both sides of the sweater and it should break free and you can continue ripping out the seam.
(more to come as I have time)
Tuesday, October 23, 2007
Make a center pull ball with a homemade Nostepinde
What is a Nostepinde, you ask? Well, let me tell you all I know which is really just very limited reading on the internet. I believe they are traditional wooden yarn winders that have been around for eeons, and, while they might not be as fast as a ball winder, they are a lot cheeper and really get the job done very nicely. Here's how I use the Nostepinde method with a piece of PVC pipe.

Start by holding the tail of the yarn with your thumb and fingers so it won't run away on you.

Wrap a 2" (or so) section on one end of the pipe (any dowel shape would work actually so don't feel stuck if you don't have pvc, you probably have a wooden spoon, right?). You'll be wrapping the pipe toward you and winding away from you (clockwise). When you have it well covered (maybe 1-2 layers of yarn), start winding from bottom to top on more of a diagonal. I've made a very exaggerated first wind to show what I mean. At first it won't want to go that direction and your first few diagonal winds will be rather shallow, but keep at it and it will get better.


Keep winding and winding, turning the pipe/dowel/stick... toward you as you wrap. Eventually the ball will cover all the first couple of rows of yarn and if you wind it right, you end up with a ball that is flat on top and bottom and won't go running away on you. Tuck the tail in with a crochet hook and slide the ball off the pipe. Et voila, a wonderful, center-pull ball.


Start by holding the tail of the yarn with your thumb and fingers so it won't run away on you.

Wrap a 2" (or so) section on one end of the pipe (any dowel shape would work actually so don't feel stuck if you don't have pvc, you probably have a wooden spoon, right?). You'll be wrapping the pipe toward you and winding away from you (clockwise). When you have it well covered (maybe 1-2 layers of yarn), start winding from bottom to top on more of a diagonal. I've made a very exaggerated first wind to show what I mean. At first it won't want to go that direction and your first few diagonal winds will be rather shallow, but keep at it and it will get better.


Keep winding and winding, turning the pipe/dowel/stick... toward you as you wrap. Eventually the ball will cover all the first couple of rows of yarn and if you wind it right, you end up with a ball that is flat on top and bottom and won't go running away on you. Tuck the tail in with a crochet hook and slide the ball off the pipe. Et voila, a wonderful, center-pull ball.


How to wind a center pull ball
First take the tail of the yarn and hold it, tail pointing down, in your non-dominant hand (for me that's my left hand). 
Start winding in a figure-8 motion between thumb and pointer finger while continuing to hold the tail with your last 3 fingers.

Pull the figure-8 off your fingers and fold it in half, then continue winding over it.


I keep my thumb over the place where the tail comes out from the ball so I don't wind over its escape route. See the little hole my thumb leaves?
 As I'm winding, I turn the ball to the right and keep wrapping around. At first I'm almost going from south to north pole, but after there's a bit of a ball, I turn the ball a little off its axis and begin winding from the bottom right hand "corner" of the ball, (ha, is that an oxymoron?) to the top left of the ball which serves to make the ball a little more flat on top and bottom which is great for keeping the ball from rolling all over the place when it's finished being wound.
When I'm done, I tuck the tail in to the ball with a crochet hook. Notice the tail coming out of the center of my center pull ball.


See how nicely they stack (well if you tilt your head, lol)?


Start winding in a figure-8 motion between thumb and pointer finger while continuing to hold the tail with your last 3 fingers.

Pull the figure-8 off your fingers and fold it in half, then continue winding over it.


I keep my thumb over the place where the tail comes out from the ball so I don't wind over its escape route. See the little hole my thumb leaves?
 As I'm winding, I turn the ball to the right and keep wrapping around. At first I'm almost going from south to north pole, but after there's a bit of a ball, I turn the ball a little off its axis and begin winding from the bottom right hand "corner" of the ball, (ha, is that an oxymoron?) to the top left of the ball which serves to make the ball a little more flat on top and bottom which is great for keeping the ball from rolling all over the place when it's finished being wound.
When I'm done, I tuck the tail in to the ball with a crochet hook. Notice the tail coming out of the center of my center pull ball.


See how nicely they stack (well if you tilt your head, lol)?

Thursday, October 18, 2007
What the kids are getting (hope they don't read my blog!)
Christmas is coming, the goose is overeating, and I'm feeling the crunch to get some toys made for the kiddos in time. Inspired by the adorable cuties at Little Cotton Rabbits, I thought I would try my hand at knitting some bunnies, bears and maybe monkeys, (not sure I'll get them figured out tho). Currently I'm working on the feet and trying to make my own pattern using short rows for the heels (like a sock with an extra large foot). I've done short rows before, but never for socks so I searched and searched for a tutorial that would explain it on a Knitting-for-dummies level and I found it. Jo from Microcrafty has a very nice, very understandable tutorial that held my hands quite nicely till I came up with a decent prototype, tho probably not my final one, have some more tweaking to do. But at least now I have a clue.
For Eli: Lots and lots of knitted (and crochet) balls, balls and more balls. Also maybe a bear or a monkey.
For Geo: Knitted finger puppets, and a knitted bear, probably some balls too
For Gigi: A knitted backpack, knitted doll, knitted rabbit, finish the quilt I started 2 years ago (!).
The list will probably grow, at least for things I'd like to make, we'll see if I have time.
For Eli: Lots and lots of knitted (and crochet) balls, balls and more balls. Also maybe a bear or a monkey.
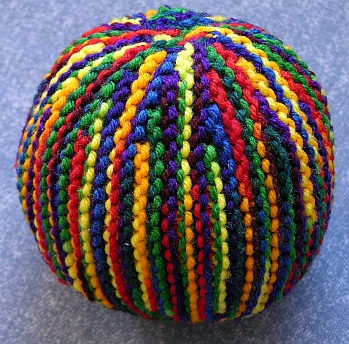
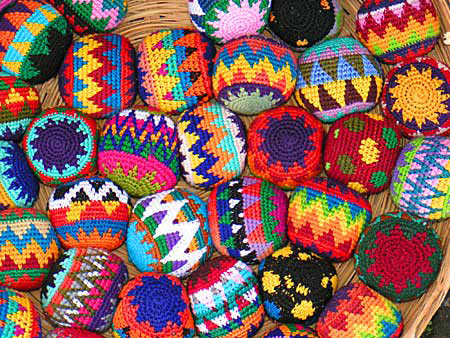
For Geo: Knitted finger puppets, and a knitted bear, probably some balls too
For Gigi: A knitted backpack, knitted doll, knitted rabbit, finish the quilt I started 2 years ago (!).
The list will probably grow, at least for things I'd like to make, we'll see if I have time.
Monday, October 01, 2007
Back in the saddle again
I'm so glad to be back to school this week. We were off last week due to moving the last little bits out of our old house. I think Geo was ready to be back to school too, he really did really well, flew thru math which is rather unusual for him, was no more distracted than usual by his sister and baby brother. The weather was wonderful this morning, crisp, lovely. We spent awhile outside, observing and trying to draw nature. It was so nice, I may just move school out of doors while the weather permits.
My l'il boy is growing up
Eli will soon be 17 months old and what a fun little guy he is. He loves to play, has to be right in the middle of whatever is going on, he's inquisitive, curious, imitative ("talks" on the cell phone, tries to "take something apart" with a screwdriver [with us right there supervising of course], tries to turn on the stove burners, glad there's a trick to it!, tries to turn on the stereo, tries to use my computer mouse move the pointer around, tries to feed himself (messy!), is starting to try to go down stairs like a big boy, tries to play guitar...), spins around in circles until he's too dizzy to stand, he's a climber, he's fearless (kind of a bad combo)...
His favorite or at least his most used vocalization is "Dah!" like the first part of Daddy. He uses it for "Daddy," "look," "Mommy," "hey, where is everybody?"... He has kind of a low sounding voice for a baby and his plaintive "Daaahhh" is such a funny, sweet sound.
He isn't saying much at all (bah for ball, Dah), but he signs: baby, bird, dog, cat, down, more, please, eat/food, bread, banana, milk, shoes, and he meows like a cat :) That one's kind of funny. It sounds like "wow," with the word slightly drug out and the mouth wide open for the vowel part of the word. It does sound rather like a cat, but much lower than our cat's dainty and high-pitched "meow." Signs I keep trying to get him to learn are: Mommy, up, thank you, tree, diaper, bath, nice/clean, good, water, cereal, ball...
His favorite or at least his most used vocalization is "Dah!" like the first part of Daddy. He uses it for "Daddy," "look," "Mommy," "hey, where is everybody?"... He has kind of a low sounding voice for a baby and his plaintive "Daaahhh" is such a funny, sweet sound.
He isn't saying much at all (bah for ball, Dah), but he signs: baby, bird, dog, cat, down, more, please, eat/food, bread, banana, milk, shoes, and he meows like a cat :) That one's kind of funny. It sounds like "wow," with the word slightly drug out and the mouth wide open for the vowel part of the word. It does sound rather like a cat, but much lower than our cat's dainty and high-pitched "meow." Signs I keep trying to get him to learn are: Mommy, up, thank you, tree, diaper, bath, nice/clean, good, water, cereal, ball...
In mourning
Well, it's official (I think), my old faithful palm pilot is kaput, no more. She had been refusing to charge properly and now she won't even power up. Sigh, sniff. We had a good run, old friend, may you rest in peace.
Sunday, September 02, 2007
My Christmas List
Ha, I know it's way early and what business do I have in posting my Christmas List, but there's one particular thing that's eating away at me, I'm trying to figure out how I can beg, rob or steal (no, not really! just joking, lol) to get my hands on one. I'm thinking the days are numbered for my faithful, but old, Palm M515. The charging base seems to have a bad connection in it so sometimes it doesn't want to sync or charge the battery. Also, there's not enough space on it for the things I want to do with it (lots of ebooks for school, for example) and I'd really like one with more memory (mine only has about 15 MB, and the 1GB card that I had extra to go with my other Palm that was stolen sadly doesn't work in the m515). So I'm looking at the latest, greatest Palm offering, the T|X. Pretty snazzy with 100MB of useable space, a much faster processor, and a bigger screen area. There is some concern that not all of my programs will run on it, but I have already determined that my favorite palm database, Handyshopper, will run on it so I'm good. About the only other thing I use it for is books for school and Bible+ (guess I'd better check on that one). They are going for under $200 new/lightly used on Ebay so I need ideas of what I can do to come up with that much money (well, a little more because I'd also like a keyboard so that I can type narrations during school). Any ideas?
I make silhouettes so if anyone wants any (kids, grandkids?), I'd be happy to do some for a small (to generous) donation. Oh, and calligraphy, I've done that for pay before, maybe a saying that is special to your family, nicely penned and framed to hang in your home? I also make straw stars (Christmas ornaments), I can knit, I learned how to do stitching cards so I could make some of those to sell...
I posted an ad on Craigslist to type handwritten documents or do any other data entry needed, we'll see if I get any nibbles from that. I've also applied to a few other data entry companies, but haven't heard back from any of them yet.
I probably just need to have a yard sale, which we plan on doing in October when the weather starts to get bearable. If I could come up with something that would even just pay me an extra $50 a week, that would be great, at least it wouldn't be too long before I could get my next "baby," just having a hard time figuring out what that might be. Oh, I do have some earrings and knitting stitch markers I could sell if anyone wanted anything like that. I think they're rather pretty.
I had thought about designing and putting together homeschooling and home organization forms and selling those either as a download or as a book and I still may do that, but that would take a good bit of time so have to figure out when I'd do that.
I think I've developed a nice system for putting my Ambleside Online schedule on my Palm into Handyshopper format so that I can check off items as a I do them and I can see in detail what I'm supposed to be doing in each time slot. That makes life very easy for me. Wonder if that would be worth anything? Probably not, but hey, it might be worth a try. I'm really just brainstorming here.
Sigh :)
Let's see, is there anything else on my "Christmas List" or am I really just rabid for a new Palm?
I make silhouettes so if anyone wants any (kids, grandkids?), I'd be happy to do some for a small (to generous) donation

I posted an ad on Craigslist to type handwritten documents or do any other data entry needed, we'll see if I get any nibbles from that. I've also applied to a few other data entry companies, but haven't heard back from any of them yet.
I probably just need to have a yard sale, which we plan on doing in October when the weather starts to get bearable. If I could come up with something that would even just pay me an extra $50 a week, that would be great, at least it wouldn't be too long before I could get my next "baby," just having a hard time figuring out what that might be. Oh, I do have some earrings and knitting stitch markers I could sell if anyone wanted anything like that. I think they're rather pretty.
I had thought about designing and putting together homeschooling and home organization forms and selling those either as a download or as a book and I still may do that, but that would take a good bit of time so have to figure out when I'd do that.
I think I've developed a nice system for putting my Ambleside Online schedule on my Palm into Handyshopper format so that I can check off items as a I do them and I can see in detail what I'm supposed to be doing in each time slot. That makes life very easy for me. Wonder if that would be worth anything? Probably not, but hey, it might be worth a try. I'm really just brainstorming here.
Sigh :)
Let's see, is there anything else on my "Christmas List" or am I really just rabid for a new Palm?
- Um, there are some school supplies I'd like to get (Nature notebooks, a few books that I can't download for free from the web, glue, pens, colored pencils, math manipulatives, paper, ink for the printer, supplies for other handicrafts down the road, downloads of the music we need for Composer Study)...
- I would like another camera as I'm not sure how long ours will last, but for now, it's probably one of those things we'll have to save up for. At least they are coming down in price (since we bought ours 6 years ago), and we'll likely be able to afford many more megapixels when we do get another one (ours is only 3 megapixels).
Another use for ramen noodles
My dear hubby happened upon this lovely way of gussying up the ever budget friendly, but very basic, ramen noodles. Here's what he does:
Take 2 stalks of celery (cut in chunks), 2 carrots (peeled, cut up), 1/2 to 1 onion, and he's either used fresh asparagus on one occasion or mushrooms on a couple of others (I also made it with just celery, carrots and onion and used Buddha's Delight gluten & vege/mushroom mix and it turned out decent too). Cook these up with some salt or seasoning salt till the carrots are nice and soft. Blend everything in the blender to make a nice "gravy." Add one of those small cans (I'm guessing 8-10 oz.) of Chinese Braised Gluten or Mock Duck or some such thing (I think you can get them in the Asian section of the supermarket), mix with about 3 packages of cooked, drained, ramen noodles (minus the seasoning packets), and there you have it, a yummy meal (cheap too), and sure to please all eating.
Take 2 stalks of celery (cut in chunks), 2 carrots (peeled, cut up), 1/2 to 1 onion, and he's either used fresh asparagus on one occasion or mushrooms on a couple of others (I also made it with just celery, carrots and onion and used Buddha's Delight gluten & vege/mushroom mix and it turned out decent too). Cook these up with some salt or seasoning salt till the carrots are nice and soft. Blend everything in the blender to make a nice "gravy." Add one of those small cans (I'm guessing 8-10 oz.) of Chinese Braised Gluten or Mock Duck or some such thing (I think you can get them in the Asian section of the supermarket), mix with about 3 packages of cooked, drained, ramen noodles (minus the seasoning packets), and there you have it, a yummy meal (cheap too), and sure to please all eating.
Tuesday, August 28, 2007
Meal Planning
I've never been great about this and in the past would find myself about 11:55 am scratching my head wondering what was for lunch. Day after day that gets to be really old fast. So I gathered up some of my/our favorite recipes that were also really simple and easy to make (and pretty inexpensive too) and threw together a menu plan. Fwiw, here is my 8 week cyclical menu plan (I'll try to post recipes for some of these when I get time in the future (lol):
Week 1
Spanish Veggie Rice
Tofu Stuffed Shells & Sauce
Sloppy Joes
Polenta
Mexican Lentils & Rice
Taco Style Lentils & Rice
Tomato Rice Pilaf
Meatloaf
Soup Ideas:
Lentil Soup
Potato Soup
Tomato Soup
ABC Soup
Cream of Broccoli Soup
Vegetable Soup with Dumplings
Once a Month Treat:
Banana Bread
Dilly Bread
Cream of Wheat pudding
Fruit soup (breakfast)
Week 1
- Sunday: Spaghetti (make bread)
- Monday: Biscuits & Egg &/or mushroom gravy
- Tuesday: Egg salad sandwiches, Soup (Broccoli, potato, or tomato)
- Wednesday: Patties (Gluten, potato/egg, rice /potato/egg/tofu...)
- Thursday: Haystacks (taco salad/tacos/tostadas/burritos)
- Friday: Mac n Cheese ( like the Tofu Rarebit recipe), Green beans, Corn on the cobb (or frozen corn)
- Sabbath: Special K (or Cottage Cheese) Loaf, Green Bean Salad (or just green beans and/or salad), Mashed Potatoes
- Sunday: Pizza, Make Bread
- Monday: Shepherd's/Pot Pie, Mashed P&G
- Tuesday: Egg & Tomato, Sandwiches, (Soak beans for tomorrow)
- Wednesday: Black Beans & Rice
- Thursday: Curry (Egg, potato/chickpea or lentil...) & rice, Chipaties
- Friday: Muffins, fruit & soup (usually a supper, not sure what to do for lunch, leftovers?)
- Sabbath: Potato/Tomato Galette
- Sunday: Spaghetti, Make Bread
- Monday: Tater tot casserole
- Tuesday: Egg salad sandwiches
- Wednesday: Patties (Gluten, potato/egg, rice /potato/egg/tofu...)
- Thursday: Haystacks
- Friday: Mac n "Cheese", (make extra cheese), Asparagus, (Soak beans)
- Sabbath: Conch Stew, Rice & Beans
- Sunday: Pizza, Make Bread
- Monday: Shepherd's/Pot Pie, Mashed P&G
- Tuesday: Tomato Soup, Grilled "Cheese" Sandwiches (Cheese leftover from Mac n Cheese), (Soak beans)
- Wednesday: Cornbread & chili, Salad
- Thursday: Chicken a la king, Broccoli, Salad (tomatoes, lettuce, mayo/catsup /soymilk dressing)
- Friday: Lunch: Perogies w/ "Nice Spaghetti Sauce," Peas & Corn
- Supper: Muffins, fruit & soup
- Sabbath: Special K Loaf, Green Bean Salad, Mashed Potatoes
- Sunday: Spaghetti, Make Bread
- Monday: Something with rice (make extra rice)
- Tuesday: Egg salad, sandwiches
- Wednesday: Patties (Gluten, potato/egg, rice /potato/egg/tofu...)
- Thursday: Fried Rice (add broccoli, scrambled eggs, onions, slivered carrots, frozen peas...)
- Friday: Mac n Cheese, Brussels Sprouts
- Sabbath: Pierogies
- Sunday: Pizza, Make Bread
- Monday: Biscuits & Egg gravy
- Tuesday: Egg & Tomato Sandwiches, Soak beans
- Wednesday: Black Beans & Rice
- Thursday: Haystacks
- Friday: Supper: Baked Rice Pudding
- Sabbath: 1 Dish Meal, Salad, Bread (rolls?)
- Sunday: Spaghetti, Make Bread
- Monday: Tater tot casserole
- Tuesday: Egg salad sandwiches
- Wednesday: Patties (Gluten, potato/egg, rice /potato/egg/tofu...)
- Thursday: Chicken a la king, Broccoli
- Friday: Mac n Cheese, (make extra cheese), Spinach
- Sabbath: Special K Loaf, Green Bean Salad, Mashed Potatoes
- Sunday: Pizza, Make Bread
- Monday: Shepherd's/Pot Pie, Mashed P&G
- Tuesday: Tomato Soup, Grilled "Cheese" Sandwiches (Cheese leftover from Mac n Cheese)
- Wednesday: Cornbread & chili, Salad
- Thursday: Fried Rice
- Friday: Supper: Muffins, fruit & soup
- Sabbath: Pierogies
Spanish Veggie Rice
Tofu Stuffed Shells & Sauce
Sloppy Joes
Polenta
Mexican Lentils & Rice
Taco Style Lentils & Rice
Tomato Rice Pilaf
Meatloaf
Soup Ideas:
Lentil Soup
Potato Soup
Tomato Soup
ABC Soup
Cream of Broccoli Soup
Vegetable Soup with Dumplings
Once a Month Treat:
Banana Bread
Dilly Bread
Cream of Wheat pudding
Fruit soup (breakfast)
Sunday, August 26, 2007
Homeschool Progress
We will be going into our fourth week of homeschool tomorrow and so far so good (-ish). I seeing some improvement so that's at least good. I decided on AmblesideOnline (a la Charlotte Mason [CM]) after much reading and determining that it's at least as good as everything else out there and it's FREE! I'm also adding some of the books from Old Fashioned Education (OFE, another great site, also free!). Charlotte Mason was a strong believer in "Living Books" (engaging and interesting books on a wide variety of subjects written by one author who is passionate about their subject and draws the reader in as opposed to a committee of writers as for a dryly written textbook) and "Narration" (telling back what the student heard or read), in addition to Nature Study (another huge component and beginning science in the early grades), Bible, Art, Music, Copywork (handwriting), Dictation for grammar and spelling in middle grades, Poetry, History, Foreign Language, Geography, Literature, Handicrafts (learning to make useful things, things with a purpose or beautiful things to be given as gifts as opposed to useless arts and crafts that just sit around collecting dust). Classes are kept short so as to not bore the student causing them to "check out" and stop paying attention. School is usually wrapped up by early afternoon leaving the afternoon for free play, chores, free reading, child-led learning if they want, art, music, ...
My schedule as it currently stands:
Bible/Character Training: MW we read an OT story, TTh an NT one, and Friday we review both stories. Will start adding in memorizing family rules, Sabbath School memory verses and discussing the importance of developing a good character and manners, etc.
Nature Study: MTW Nature walk, Observation, Nature Journal (when I can get one put together for Geo), and read about Mammals. Thursday, read from one of the Among the (Forest, Meadow, Farmyard, Night...) People books. Friday, either a science DVD from the library or a science experiment from a book we have.
Math: We are doing the Math Enhancement Programme from the UK, Year 1, but I'd like to get caught up to Year 2 so will probably go a little faster than the plan laid out at OFE, or at least we'll go year round and eventually get caught up that way.
Drawing (Drawing with Children by Mona Brooke, we'll also be watching some of Jan Brett's drawing videos)/Artist (Leonardo da Vinci) /Composer (Nicolai Rimsky-Korsakov) /Folk Song (Go Get the Ax) /Hymn (Children of the Heavenly Father) /Handicraft things (for this term we're going to be working on/perfecting knitting. Right now Geo is getting pretty adept at finger knitting) will be scattered throughout the week.
Literature: Scheduled reading from assigned books MWF with Free Reading (from grade appropriate living books not assigned for this year's reading) on TTh
Phonics: M-Th (McGuffey's Reader & Speller, & Word Mastery per OFE schedule)
Sign Language: M-Th, Friday we review all known signs or at least quite a few.
World History: M
American History: TW
Book of Centuries: TF Collect entries from week's readings, compile with pics and blurbs from the web, print out and glue in Book of Centuries.
Geography/Social Studies: TTh Paddle-to-the-Sea (a story about a little model canoe that makes a journey through the great lakes region from just north of Lake Superior all the way to the Atlantic Ocean), F Seven Little Sisters... from OFE schedule (I'm guessing it features little "sisters" from each of the seven continents)
Mapping: We map things on Google Maps whenever we read of a notable place.
Copywork & Memory work: M-F
I'm very excited about the coming year. I'm scouring every CM resource I can find on the net so I can fully grasp her philosophy of education. I need some help getting Geo to pay attention and narrate back to me what he heard (if he even listened). I may play around with shortening lesson times and bringing back the lesson later in the morning if needed. I think I will be adding lapbooking to our narrating in that I want to turn each narration into a little book to go into a larger lapbook (maybe 1 a month or 1 a quarter?). Need to save my pennies so I can get a little recorder so that Geo can narrate into it and I can type it out later (or use DH's laptop for dictating narrations).
I have been able to get 85% of the books required free from the net as most of them are now in the public domain. The rest of them I plan to get from the library or substitute with a suitable free alternative (Project Gutenberg and Baldwin Online are my friends :). I've put the free books I can get onto my Palm Pilot so I can just pretty much pick up and go and I think that's pretty neat.
My schedule as it currently stands:
Bible/Character Training: MW we read an OT story, TTh an NT one, and Friday we review both stories. Will start adding in memorizing family rules, Sabbath School memory verses and discussing the importance of developing a good character and manners, etc.
Nature Study: MTW Nature walk, Observation, Nature Journal (when I can get one put together for Geo), and read about Mammals. Thursday, read from one of the Among the (Forest, Meadow, Farmyard, Night...) People books. Friday, either a science DVD from the library or a science experiment from a book we have.
Math: We are doing the Math Enhancement Programme from the UK, Year 1, but I'd like to get caught up to Year 2 so will probably go a little faster than the plan laid out at OFE, or at least we'll go year round and eventually get caught up that way.
Drawing (Drawing with Children by Mona Brooke, we'll also be watching some of Jan Brett's drawing videos)/Artist (Leonardo da Vinci) /Composer (Nicolai Rimsky-Korsakov) /Folk Song (Go Get the Ax) /Hymn (Children of the Heavenly Father) /Handicraft things (for this term we're going to be working on/perfecting knitting. Right now Geo is getting pretty adept at finger knitting) will be scattered throughout the week.
Literature: Scheduled reading from assigned books MWF with Free Reading (from grade appropriate living books not assigned for this year's reading) on TTh
Phonics: M-Th (McGuffey's Reader & Speller, & Word Mastery per OFE schedule)
Sign Language: M-Th, Friday we review all known signs or at least quite a few.
World History: M
American History: TW
Book of Centuries: TF Collect entries from week's readings, compile with pics and blurbs from the web, print out and glue in Book of Centuries.
Geography/Social Studies: TTh Paddle-to-the-Sea (a story about a little model canoe that makes a journey through the great lakes region from just north of Lake Superior all the way to the Atlantic Ocean), F Seven Little Sisters... from OFE schedule (I'm guessing it features little "sisters" from each of the seven continents)
Mapping: We map things on Google Maps whenever we read of a notable place.
Copywork & Memory work: M-F
I'm very excited about the coming year. I'm scouring every CM resource I can find on the net so I can fully grasp her philosophy of education. I need some help getting Geo to pay attention and narrate back to me what he heard (if he even listened). I may play around with shortening lesson times and bringing back the lesson later in the morning if needed. I think I will be adding lapbooking to our narrating in that I want to turn each narration into a little book to go into a larger lapbook (maybe 1 a month or 1 a quarter?). Need to save my pennies so I can get a little recorder so that Geo can narrate into it and I can type it out later (or use DH's laptop for dictating narrations).
I have been able to get 85% of the books required free from the net as most of them are now in the public domain. The rest of them I plan to get from the library or substitute with a suitable free alternative (Project Gutenberg and Baldwin Online are my friends :). I've put the free books I can get onto my Palm Pilot so I can just pretty much pick up and go and I think that's pretty neat.
Splintzell Sprouts
Gigi calls Brussels' Sprouts Splintzell Sprouts and I think it's the most adorable thing (she loves them btw) and I don't want to forget it so I'm blogging about it here.
Oh, also, while I'm jotting things down (and was very remiss in not getting the exact days), Eli cut his incisors about a month ago (yeah, all of them at once), and his molars came in about a month before that.
Oh, also, while I'm jotting things down (and was very remiss in not getting the exact days), Eli cut his incisors about a month ago (yeah, all of them at once), and his molars came in about a month before that.
I'm a speller, I can spell ([What about] Bob's in my head saying "I'm a sailor, I can sail")
A couple of double letter words tried to trip me up but in the end I was victorious, bwahahaha
Give it a try, it's short and kinda fun :)
Give it a try, it's short and kinda fun :)
Mingle2 - Free Online Dating
Thursday, August 09, 2007
Word Saving Glich
A few days ago I was working on Word and started noticing that things I knew I had saved weren't showing up when I closed the file and opened it again. It was frustrating to say the least! I did some searching around and at first I thought it might be a bad relationship between Adobe 7 & Word 2000, but was hesitant to uninstall Adobe. Instead I uninstalled/reinstalled Word (that took a good long time too tho), and it didn't fix the problem. Then I found something that suggested the normal.dot file might be corrupted so I deleted every instance of that file I could find. That seemed to be the magic bullet because now things are humming along again quite nicely, I'm once again able to make pdf files (that was messed up too) and my changes are being saved. I'm happy that it was such an easy fix.
Saturday, August 04, 2007
The Final Straw
They've been sat upon, bent out of shape several times till the other day they were contorted to the max (by a friend's 2 yo) and then the final straw was when Geo bumped into me when we were reading a book on the couch and ... *snap* one of the ear thingies popped right off my glasses, broke clean off :( It stinks because the only way we can replace them is to dip into our tiny emergency fund that we're trying to grow for Financial Peace University (HIGHLY recommended btw), but I can't drive without glasses, I'll be a sitting duck. It really stinks. I was so hoping they would last a little longer. Not that I won't be glad to get new glasses (my lenses look terrible!), but this is not the way I wanted it to happen (not the time either).
Friday, July 27, 2007
And now for something completely different
Have to start this with a shout out to my friend, Nichole, who gave me the idea for this new little project of mine. After looking at the extensive instructions found here, I started making my very own case bound book (like a real hard cover book that you'd buy in the store). Here are some pics and my thoughts about the process. For my part I'm sure I'm doing this "all wrong" because I don't have the right kind of glue or board or paper for that matter, but I'm doing the best with what I have and I'm right happy with the results (so far).
The first thing I did was to make 4 signatures (a stack of paper folded in half in a very basic "book fold") of 8 sheets of regular 8.5 x 11 inkjet paper (16 pages) each, folding each sheet individually to insure a nice, sharp crease before putting the folios together to make the signatures. I had already printed out what I wanted in my book (in my case my homeschool planner), laid it all out in Publisher and printed the first 32 pages front-and-back, then the next and so on till I had what I needed for 4 signatures. I figured out what I was going to use for the cloth hinges (in my case that turned out to be some green bias tape I had on hand), and linen tape (bias tape folded in half). I prepared the endsheets as described. Then I figured out where I was going to put my "linen tape," (in my case I went with 3) and marked on all the signatures where to punch the holes. The kids helped me with that part by pushing a thumb tack into each marking. Then I found a needle and some bedspread weight crochet thread that I had, and started sewing the signatures together. Then I fashioned a crude book press with a couple pieces of particle board that were lying around and a couple of clamps to hold them together. I banged on the spine with a metal thingamabob that I had handy to flatten them down a bit and make them flair out. It stayed like that all night. I glued a strip of watercolor paper on the spine, then another piece of bias tape, opened up. I made some headbands for the top and bottom of the spine and glued them on (I think I got the order wrong, but ... who cares :). It stayed like that all night. This morning I made the case for my book. I didn't have board, the closest thing to the consistency was cereal boxes, but they are much too thin so I glued three layers together to make the right thickness. They sat piled under a whole bunch of Bible Story Books till they dried. Then I found some fabric for the cover, measured it like they told me to (forgot to add the 3mm for an overhang, bummer) glued the paper strip down the middle and the boards on either side, then glued the fabric up and inside the cover. When that was dry, I put my book innards inside the cover, and with the help of some wax paper (hope it works!) I glued the flappy parts (hinges) to the inside cover of the book, front and back. In the morning, if I want, (probably closer to tomorrow evening tho), I'll be able to glue the paste-downs to the front and back cover and voila... I'll have my very own hard cover book made completely by me. Pretty cool if I do say so myself. And very economical too. I had everything on hand so it didn't cost me a dime. Glue is cheep (especially this time of year with school sales going on), cereal boxes are free, I have tons of fabric scraps, the only thing that I have to pay for is the paper which is something I usually have on hand anyway. Now I think I'd like to print my cookbook and bind it :) The possibilities are endless.
Pics added 7/28/07


Notice the signatures in the 4th picture, the last picture shows the importance of gluing the cereal box cardboard with the pictures in (you can barely make out part of the Weetabix logo on the inside of my back cover, lol). In the third picture you can see the stitching down the center of one of the signatures. Just for fun, go find a hard bound book and find the string at the center of a signature.
The first thing I did was to make 4 signatures (a stack of paper folded in half in a very basic "book fold") of 8 sheets of regular 8.5 x 11 inkjet paper (16 pages) each, folding each sheet individually to insure a nice, sharp crease before putting the folios together to make the signatures. I had already printed out what I wanted in my book (in my case my homeschool planner), laid it all out in Publisher and printed the first 32 pages front-and-back, then the next and so on till I had what I needed for 4 signatures. I figured out what I was going to use for the cloth hinges (in my case that turned out to be some green bias tape I had on hand), and linen tape (bias tape folded in half). I prepared the endsheets as described. Then I figured out where I was going to put my "linen tape," (in my case I went with 3) and marked on all the signatures where to punch the holes. The kids helped me with that part by pushing a thumb tack into each marking. Then I found a needle and some bedspread weight crochet thread that I had, and started sewing the signatures together. Then I fashioned a crude book press with a couple pieces of particle board that were lying around and a couple of clamps to hold them together. I banged on the spine with a metal thingamabob that I had handy to flatten them down a bit and make them flair out. It stayed like that all night. I glued a strip of watercolor paper on the spine, then another piece of bias tape, opened up. I made some headbands for the top and bottom of the spine and glued them on (I think I got the order wrong, but ... who cares :). It stayed like that all night. This morning I made the case for my book. I didn't have board, the closest thing to the consistency was cereal boxes, but they are much too thin so I glued three layers together to make the right thickness. They sat piled under a whole bunch of Bible Story Books till they dried. Then I found some fabric for the cover, measured it like they told me to (forgot to add the 3mm for an overhang, bummer) glued the paper strip down the middle and the boards on either side, then glued the fabric up and inside the cover. When that was dry, I put my book innards inside the cover, and with the help of some wax paper (hope it works!) I glued the flappy parts (hinges) to the inside cover of the book, front and back. In the morning, if I want, (probably closer to tomorrow evening tho), I'll be able to glue the paste-downs to the front and back cover and voila... I'll have my very own hard cover book made completely by me. Pretty cool if I do say so myself. And very economical too. I had everything on hand so it didn't cost me a dime. Glue is cheep (especially this time of year with school sales going on), cereal boxes are free, I have tons of fabric scraps, the only thing that I have to pay for is the paper which is something I usually have on hand anyway. Now I think I'd like to print my cookbook and bind it :) The possibilities are endless.
Pics added 7/28/07


Notice the signatures in the 4th picture, the last picture shows the importance of gluing the cereal box cardboard with the pictures in (you can barely make out part of the Weetabix logo on the inside of my back cover, lol). In the third picture you can see the stitching down the center of one of the signatures. Just for fun, go find a hard bound book and find the string at the center of a signature.
He's getting so big
Our little Eli is starting to do SO many things. Not only is he running around everywhere, climbing on things, dancing to music, spinning around in circles till he's dizzy, and basically acting silly, he's also starting to try to talk (Ba for ball, bapoo for diaper, mo for more), he's learning to sign (can sign "more," "eat," & "thank you") and last night he apparently saw the moon for the first time and made sure to point it out to me. He stared and stared at it for the longest time, it was kinda cute.
Addendum 7/25/07: As of today he's also signed (copying us) car & dog. He's so into things, really understands what's going on. At supper I asked him to sign something with his hands and he immediately started signing eat and more.
The older two (after watching a couple of DVDs from the library) now know signs for: eat, drink, socks, shoes, hat, baby, flower, water, milk, sit, stand, off, on, open, close, book, help, want, more, cookie, boy, girl, mommy, daddy, grandma, grandpa, bird, fish, cat, dog, thank you, please, be, good, hungry, happy, play, stop, go, on, off, video, sleep and I'm sure a few more that I can't think of right now. Pretty cool. Sign language is definitely going to be a part of homeschool for us, like a second language or secret language or something :)
Addendum 7/25/07: As of today he's also signed (copying us) car & dog. He's so into things, really understands what's going on. At supper I asked him to sign something with his hands and he immediately started signing eat and more.
The older two (after watching a couple of DVDs from the library) now know signs for: eat, drink, socks, shoes, hat, baby, flower, water, milk, sit, stand, off, on, open, close, book, help, want, more, cookie, boy, girl, mommy, daddy, grandma, grandpa, bird, fish, cat, dog, thank you, please, be, good, hungry, happy, play, stop, go, on, off, video, sleep and I'm sure a few more that I can't think of right now. Pretty cool. Sign language is definitely going to be a part of homeschool for us, like a second language or secret language or something :)
Sunday, April 29, 2007
Numbness and tingling
Well, it seems that I'm experiencing my second side effect from the wreck (besides the slight sore neck). My left arm has been going numb on me since yesterday. I feel like I need to keep waking it up. Well, it's not exactly tingly like it's waking up from being asleep, but just a weird numb feeling. I do hope that the chiropractor will be able to determine what's causing it.
Subscribe to:
Posts (Atom)